Loading [Contrib]/a11y/accessibility-menu.js

2018年7月15日日曜日

UICollectionViewの並び替え(iOS11編)

「UICollectionViewの並び替え(よくある編)」のつづきです。


並び替えの出来るUICollectionViewは前回の方法で実現できますが、iOS11で追加されたドラッグ・アンド・ドロップの機能を使った方法もあります。

このドラッグ・アンド・ドロップ機能は、本来はiPad上で2つのアプリを開いた状態で、アプリをまたいだセルのドラッグ・アンド・ドロップで、データを受け渡すために導入されたものです。iPhoneでは、複数のアプリを開くことは出来ませんので、同じアプリ内でのドラッグ・アンド・ドロップになります。

今回は、このドラッグ・アンド・ドロップをUICollectionViewの中に適用することでセルの並び替えを実装します。


♪ ♪ ♪


まず、前回「UICollectionViewの並び替え(よくある編)」で作成した「とりあえずUICollectionViewを表示」のプロジェクトを用意します。ここにドラッグ・アンド・ドロップの処理を追加していきます。追加するのはUICollectionViewDragDelegateとUICollectionViewDropDelegateです。


ViewController+UICollectionViewDragDelegate.swift
import UIKit
extension ViewController: UICollectionViewDragDelegate {
func collectionView(_ collectionView: UICollectionView, itemsForBeginning session: UIDragSession, at indexPath: IndexPath) -> [UIDragItem] {
let n = "\(numbers[indexPath.item])"
let itemProvider = NSItemProvider(object: n as NSString)
let dragItem = UIDragItem(itemProvider: itemProvider)
return [dragItem]
}
}
ドラッグ開始(リフト)時の処理です。
indexPathでセルの位置がわかるので、ドラッグされるアイテムとしてUIDragItemの配列にして返します。


ViewController+UICollectionViewDropDelegate.swift
import UIKit
extension ViewController: UICollectionViewDropDelegate {
func collectionView(_ collectionView: UICollectionView, canHandle session: UIDropSession) -> Bool {
return session.hasItemsConforming(toTypeIdentifiers: NSString.readableTypeIdentifiersForItemProvider)
}
func collectionView(_ collectionView: UICollectionView, dropSessionDidUpdate session: UIDropSession, withDestinationIndexPath destinationIndexPath: IndexPath?) -> UICollectionViewDropProposal {
if session.localDragSession != nil {
return UICollectionViewDropProposal(operation: .move, intent: .insertAtDestinationIndexPath)
} else {
return UICollectionViewDropProposal(operation: .copy, intent: .insertAtDestinationIndexPath)
}
}
func collectionView(_ collectionView: UICollectionView, performDropWith coordinator: UICollectionViewDropCoordinator) {
let destinationIndexPath: IndexPath //移動先
if let indexPath = coordinator.destinationIndexPath, indexPath.row < collectionView.numberOfItems(inSection: 0) {
destinationIndexPath = indexPath
} else {
let section = collectionView.numberOfSections - 1
let item = collectionView.numberOfItems(inSection: section) - 1
//余白にドロップしたときは、末尾に移動
destinationIndexPath = IndexPath(item: item, section: section)
}
switch coordinator.proposal.operation {
case .move:
let items = coordinator.items
if items.contains(where: { $0.sourceIndexPath != nil }) {
if items.count == 1, let item = items.first {
reorder(collectionView, item: item, to: destinationIndexPath, with: coordinator) //セルの並び替え
}
}
default:
return
}
}
// MARK: - PRIVATE METHODS
/// セルの並び替え
///
/// - Parameters:
/// - sourceIndexPath: 移動元の位置
/// - destinationIndexPath: 移動先の位置
private func reorder(_ collectionView: UICollectionView, item: UICollectionViewDropItem, to destinationIndexPath: IndexPath, with coordinator: UICollectionViewDropCoordinator) {
guard let sourceIndexPath = item.sourceIndexPath else {
return
}
collectionView.performBatchUpdates({
//配列の更新
let n = numbers.remove(at: sourceIndexPath.item)
numbers.insert(n, at: destinationIndexPath.item)
//セルの移動
collectionView.deleteItems(at: [sourceIndexPath])
collectionView.insertItems(at: [destinationIndexPath])
})
coordinator.drop(item.dragItem, toItemAt: destinationIndexPath)
}
}
ドラッグ終了(ドロップ)時の処理です。


ViewController.swift
import UIKit
class ViewController: UIViewController {
@IBOutlet weak var collectionView: UICollectionView!
var numbers: [Int] = []
override func viewDidLoad() {
super.viewDidLoad()
for n in 0..&lt;100 {
numbers.append(n)
}
collectionView.dragDelegate = self
collectionView.dropDelegate = self
collectionView.dragInteractionEnabled = true //ドラッグ可能に
}
}
最後にデリゲートの設定を忘れないようにして、完成です。


iOS10までしか対応されていないiPhone5などがまだ現役だったりすることを考えると、ちょっと採用しづらいかもしれませんが、こっちにはこっちの利点があると思うので、この方法も選択肢のひとつとしておくのも良いのではないでしょうか。


iOS11のドラッグ・アンド・ドロップ機能は、この本が詳しいです。
iOS 11 Programming
  • 著者:堤 修一,吉田 悠一,池田 翔,坂田 晃一,加藤 尋樹,川邉 雄介,岸川克己,所 友太,永野 哲久,加藤 寛人,
  • 発行日:2017年11月16日
  • 対応フォーマット:製本版,PDF
  • PEAKSで購入する

2018年7月1日日曜日

UICollectionViewの並び替え(よくある編)

並び替えが出来るUICollectionViewに関する備忘録です。


まず、単純にUICollectionViewを表示するプロジェクトを作成しておきます。セルにラベルを用意して、番号を表示させているだけです。storyboardで、セルに色を付けておくと動作チェックがやりやすいかと思います。


ViewController.swift
import UIKit
class ViewController: UIViewController {
@IBOutlet weak var collectionView: UICollectionView!
var numbers: [Int] = []
override func viewDidLoad() {
super.viewDidLoad()
for n in 0..<100 {
numbers.append(n)
}
}
}
ラベルに表示するデータを用意しています。
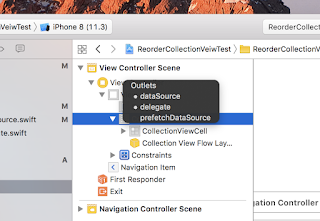
UICollectionViewDataSourceとUICollectionViewDelegateへの、selfのセットがありませんが、storyboard上で設定しておくと良いと思います。

右ドラッグで、クイっと。


ViewController+UICollectionViewDataSource.swift
import UIKit
extension ViewController: UICollectionViewDataSource {
func collectionView(_ collectionView: UICollectionView, numberOfItemsInSection section: Int) -> Int {
return numbers.count
}
func collectionView(_ collectionView: UICollectionView, cellForItemAt indexPath: IndexPath) -> UICollectionViewCell {
let kReorderCardsCollectionViewCell = "CollectionViewCell"
let c = collectionView.dequeueReusableCell(withReuseIdentifier: kReorderCardsCollectionViewCell, for: indexPath)
guard let cell = c as? CollectionViewCell else {
return c
}
cell.label.text = "\(numbers[indexPath.item])"
return cell
}
}
セル上のラベルにインデックスを表示しています。


忘れがちですね、reuse idの設定


ViewController+UICollectionViewDelegate.swift
import UIKit
extension ViewController: UICollectionViewDelegate {
}
ラベルの表示だけなので、特に処理はありません。


CollectionViewCell.swift
import UIKit
class CollectionViewCell: UICollectionViewCell {
@IBOutlet weak var label: UILabel!
}
セルにはラベルだけです。


これで実行すれば、とりあえずCollectionViewが表示されます。

とりあえず表示だけ


この状態のプロジェクトは次回にまた使うので、コミットをしておいてください。単純にコピーして取っておいてもかまいません。


♪ ♪ ♪


さて、ここから並べ替えが出来るように修正します。行うことは3つだけです。
  1. CollectionViewのセルの移動を可能にする。
  2. セルの移動処理を追加する。
  3. ロングタップのリスナーを登録する


ViewController+UICollectionViewDataSource.swift
import UIKit
extension ViewController: UICollectionViewDataSource {
//省略//
func collectionView(_ collectionView: UICollectionView, canMoveItemAt indexPath: IndexPath) -> Bool {
return true
}
func collectionView(_ collectionView: UICollectionView, moveItemAt sourceIndexPath: IndexPath, to destinationIndexPath: IndexPath) {
reorderCells(sourceIndex: sourceIndexPath.item, destinationIndex: destinationIndexPath.item)
}
// MARK: - PRIVATE METHODS
/// セルの移動
///
/// - Parameters:
/// - sourceIndex: 移動元の位置
/// - destinationIndex: 移動先の位置
private func reorderCells(sourceIndex: Int, destinationIndex: Int) {
let n = numbers.remove(at: sourceIndex)
numbers.insert(n, at: destinationIndex)
}
}
collectionView(_ collectionView: UICollectionView, canMoveItemAt indexPath: IndexPath)でtrueを返して、セルの移動を可能にしています。

移動したときの挙動を、collectionView(_ collectionView: UICollectionView, moveItemAt sourceIndexPath: IndexPath, to destinationIndexPath: IndexPath)に書きます。この例では元データの配列を移動しているだけです。


ViewController+LongPress.swift
import UIKit
extension ViewController {
/// セルの長押しのリスナーの登録
func addLongPressGestureListner() {
let longPressGesture = UILongPressGestureRecognizer(target: self, action: #selector(handleLongGesture(gesture:)))
collectionView.addGestureRecognizer(longPressGesture)
}
// MARK: - PRIVATE METHODS
/// セルの長押しジェスチャーのアクション
///
/// - Parameters: gesture
@objc
private func handleLongGesture(gesture: UILongPressGestureRecognizer) {
switch gesture.state {
case .began:
guard let selectedIndexPath = collectionView.indexPathForItem(at: gesture.location(in: collectionView)) else {
break
}
collectionView.beginInteractiveMovementForItem(at: selectedIndexPath)
case .changed:
collectionView.updateInteractiveMovementTargetPosition(gesture.location(in: gesture.view))
case .ended:
collectionView.endInteractiveMovement()
default:
collectionView.cancelInteractiveMovement()
}
}
}
CollectionViewの長押しのリスナーです。


ViewController.swift
import UIKit
class ViewController: UIViewController {
@IBOutlet weak var collectionView: UICollectionView!
var numbers: [Int] = []
override func viewDidLoad() {
super.viewDidLoad()
for n in 0..<100 {
numbers.append(n)
}
addLongPressGestureListner() //セルの長押しのリスナーの登録
}
}
あとは、ViewControllerのviewDidLoad()で、長押しのリスナーを登録します。
これで、セルの移動が可能になります。


めでたし、めでたし。で、「UICollectionViewの並び替え(iOS11編)」に続きます。